
1 – Make an awesome cover photo for your event

If you’re anything like me you want to work smarter, not harder! Also, you want to save where possible. However, you want to have things looking professional and thought out. This is why I used this Online Graphic Designer to create an easy and fun collage for my event cover photo. Simply choose the Facebook cover option, and choose how many photos you would like to add by clicking the template on the left-hand side.
To add photos simply click on the plus sign (+) in the white squares. Once you’ve completed your design, go to the top and click on download, name your cover photo, click download again, then click on “download for free now.” And voilà! Just like that you have a beautiful event cover photo ready to be uploaded! (Mine is the featured image of this blog post!)
2 – Make an online baby registry
Nowadays there are so many baby registries that you can sign up for. Click here for a list of top registries on the What to Expect website. Given that I live in Italy, the easiest list for me to use was Amazon.it “lista nascita”. By choosing the local amazon it kept all of my guests from paying any extra shipping fees and they also didn’t have to worry about if the product is available to ship to my country or not. I explained that if they use the Chrome web browser, it can automatically translate the website to their language if needed. I also offered to create a video of how to purchase off my registry. I also directed guests to use Google Translate or contact me directly for any translation needs. No one has had any issues purchasing and it’s SO fun looking around the amazon stores adding everything that we need/want for the baby. I originally thought it would be best to put fewer things on the list, but learned that adding more things actually made it easier/more fun for my guests because they have more to choose from. I have to add that when I created my registry, Amazon also had some promotional items that could be free add-on items. In my case, I got some free diapers!
3 – Create the Facebook event
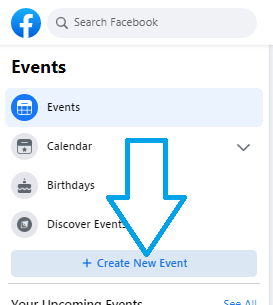
Creating an event is really easy! Simply click on Create New Event. Decide if you want this to be a private event or a public one. I decided to make mine a private event, but allow my guests to invite other guests if they wanted to bring a friend. Once you decide on your baby shower’s privacy, continue to required details. This is where you can name your baby shower, add a start and finish date, description, and upload that beautiful event cover photo that you previously created and saved.
Please keep in mind that a Facebook event cannot be longer than 2 weeks. The best way to deal with this would be to have the start date around the due date of your baby. You can have the event end up to two weeks after the baby’s due date. DO NOT make the start date today’s date. It has to be out into the future because once it finishes, you cannot update the date of the event, add guests, etc. You can also add a co-host. My best friend wanted to host mine so we decided to host together.


4 – In the event description include the link to your online baby registry and a welcome message to all of your guests
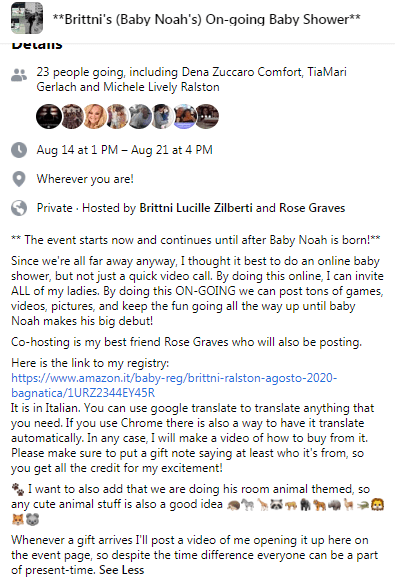
This is a big one! Don’t forget to include a direct link to your registry in the description, not just in a post on the page. This makes it easy for your guests to find it no matter how many posts are up in your event. You can also add directions as to how to purchase off of your registry. Here is the example of my description from my baby shower:
5 – Invite all of your ladies (I kept mine ‘girls only’, but some like it to be co-ed and that’s cool too!)
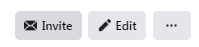
Just click on ‘invite’ and go to town! Click on all of the people that you would like to add to your event. A lot of people don’t always check their event invites, so it may help to also send some messages to your friends to direct them to check their Facebook event invites. I encouraged everyone who wanted to participate to actually click on ‘going’ otherwise they may not receive notifications.
6 – Time to start the party!
I highly recommend posting a video of you welcoming all of your guests! This is probably the only post for the first couple of days. This way people have a chance to see the invite before the games actually start. Click here (post coming soon) to see different game and activity ideas to keep the party going!
7 – Don’t forget your thank you cards! (ecard/postcard!)
This is something that should be done for any event. Given that this is an e-event you can most definitely send a thank you email. However, I would definitely recommend sending a physical thank-you note or party favor. Small little gifts thanking your guests for their participation can be sent using Amazon.com or thank you cards can be sent thanking guests as well. Given that you can be celebrating all the way up until the baby is born, why not personalize these thank you cards with a picture of your baby with a handwritten note from you?! I personally have used Zazzle and you can make something beautiful no matter what your budget!

1 thought on “How to Host an on-going Facebook Baby Shower”